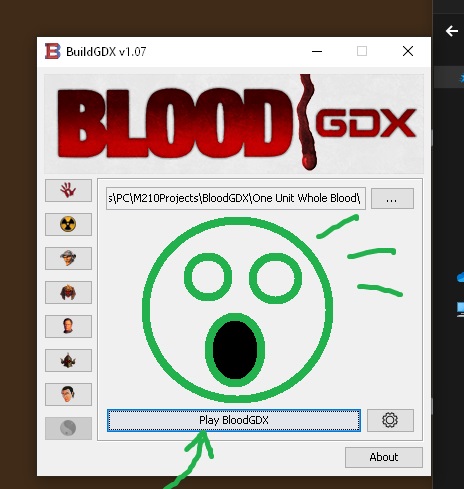
BloodGDX is a source port of the original Blood for modern operating systems that use the libGDX framework for Java. Created by Alexander “[M210]” Makarov, the lead developer of the previous BloodCM, it was first announced on January 9, 2017, and had its first public beta version v0.75 on May 19, 2017.
In addition to direct reverse engineering, the implementation of the leaked Blood Alpha full source code is referenced. It is also based on a prototype called gdxTekwar for William Shatner’s TekWar released on January 7, 2016; Makarov has expressed interest in trying a similar effort for Redneck Rampage. Somewhat controversially, Makarov has indicated that he has no immediate plans to release the source code to BloodGDX.
BloodGDX allows you to finally play Original Blood on modern computers with full widescreen support and many other great features that make it a much more enjoyable experience.
Features
- An easy-to-use launcher.
- Release of VSync and FPS.
- Possibility of selecting different Midi controllers.
- Possibility to change the type of music to CD Music or MIDI.
- It is still compatible with the original add-ons and mods from Blood fans.
- Wide screen support.
- Texture filtering, anisotropy, true color textures, and various other visual enhancement options.
- High-resolution sprites, skyboxes, glow, and detail mapping.
- Improved mouselook to make it smoother.
- Game Options, which allow players to activate or deactivate different game functions, such as rolling and incline.
- Possibility of launching custom maps by placing them in the “maps” subfolder.
- Working on the game console.
- Automatically save when the player reaches a new level.
Other compatible games
- Duke Nukem 3D, including the World Tour episode
- Warrior of the shadows
- Redneck Rampage and Redneck Rampage ride again
- PowerSlave / Exhumed
- TekWar by William Shatner
- Witchaven and Witchaven II: Blood Vengeance
- Legend of the Seven Paladins
Download BloodGDX

How to install BloodGDX
PART ONE: My first adventure into failure.
This is to show the makers of cool things how novices think when they don’t know how your thing works. The point is to educate on how NOT to make installation instructions like “Step 1: install. Step 2: play. It’s that easy.” No it’s not.)
So I downloaded BloodGDX into my games folder on my desktop (the ones I didn’t link to Steam, for reasons unimportant). I have the original game and despite that still bought the DosBox version a long time ago. I hae tried many times to get Blood working on my computers over the years and often failed. But thanks to BloodGDX, I can finally play Blood again! So here we go.
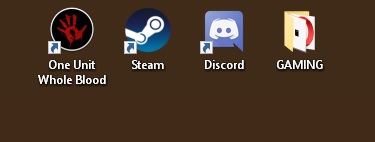
Which is this: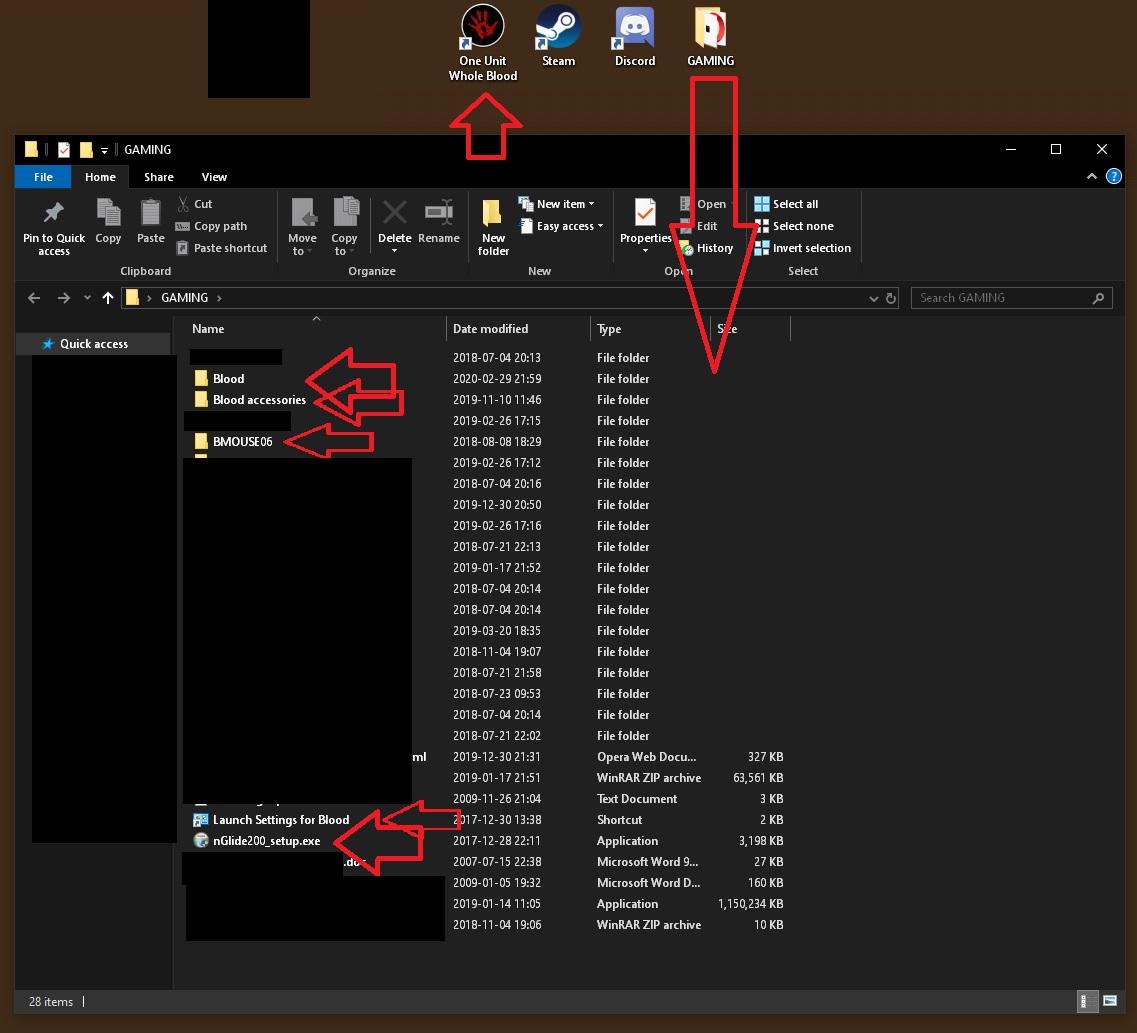 Then
Then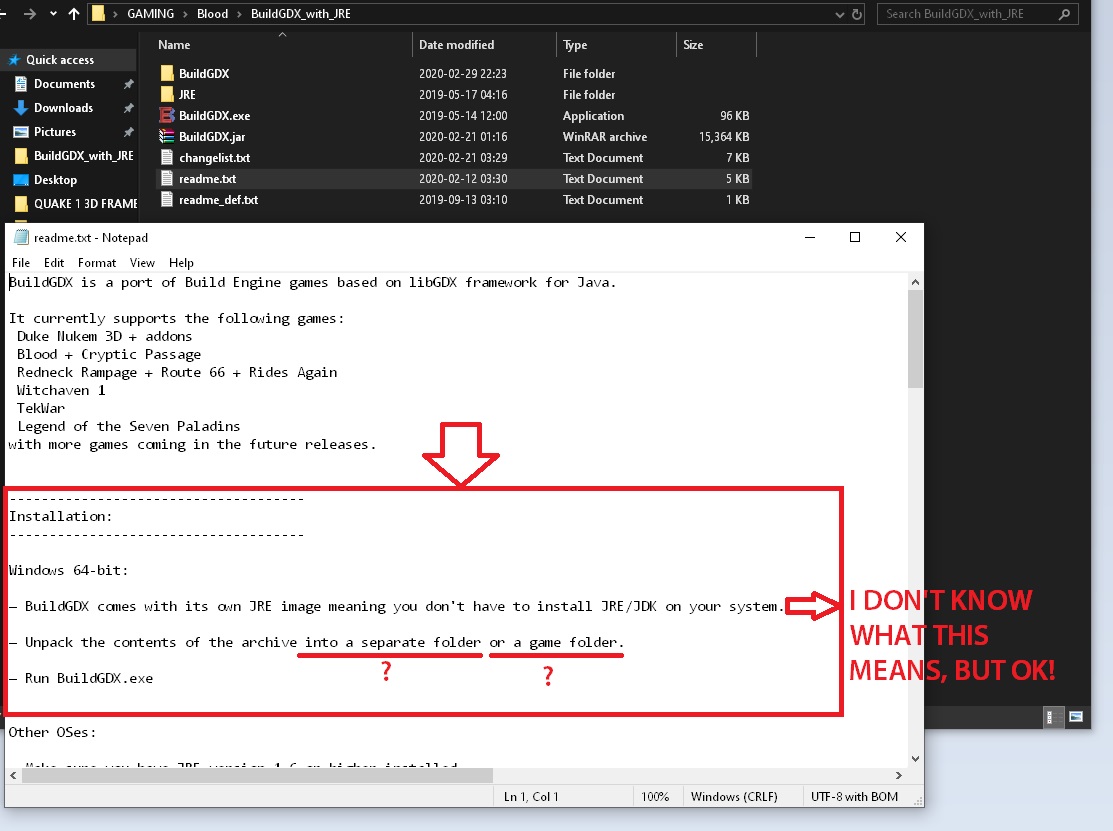 Then
Then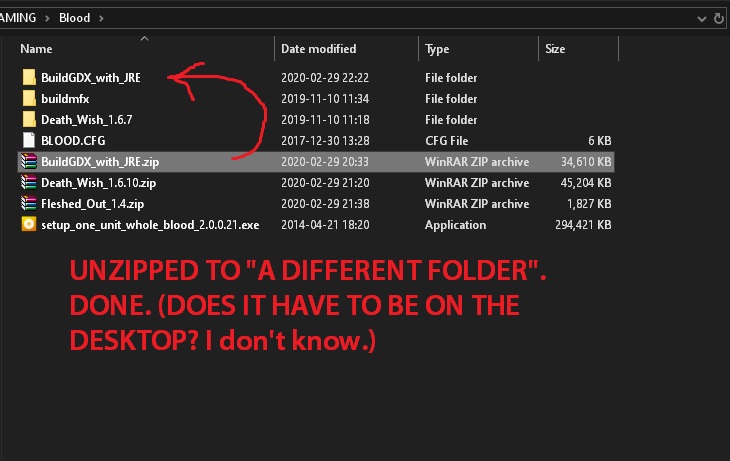 Then
Then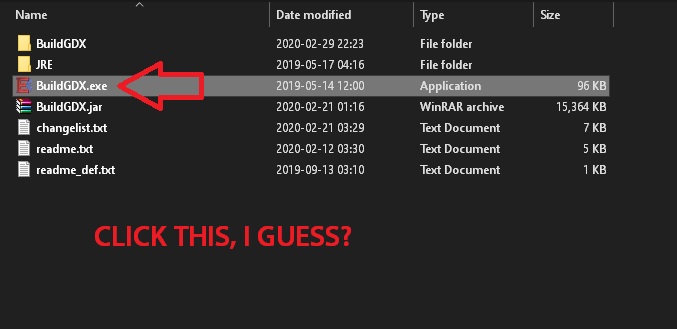 Then
Then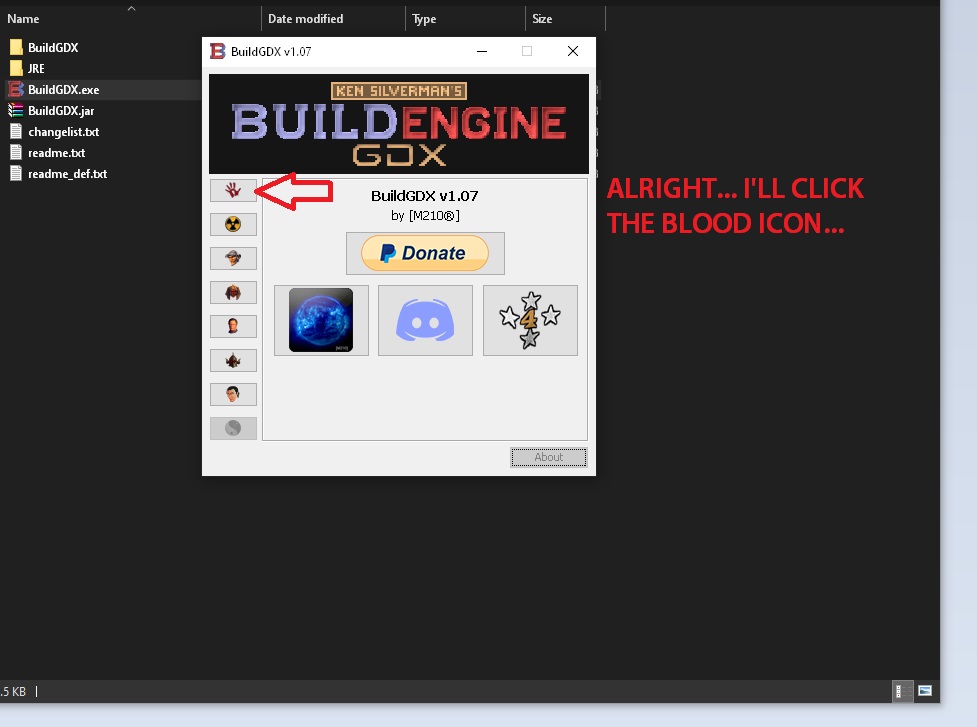 Then
Then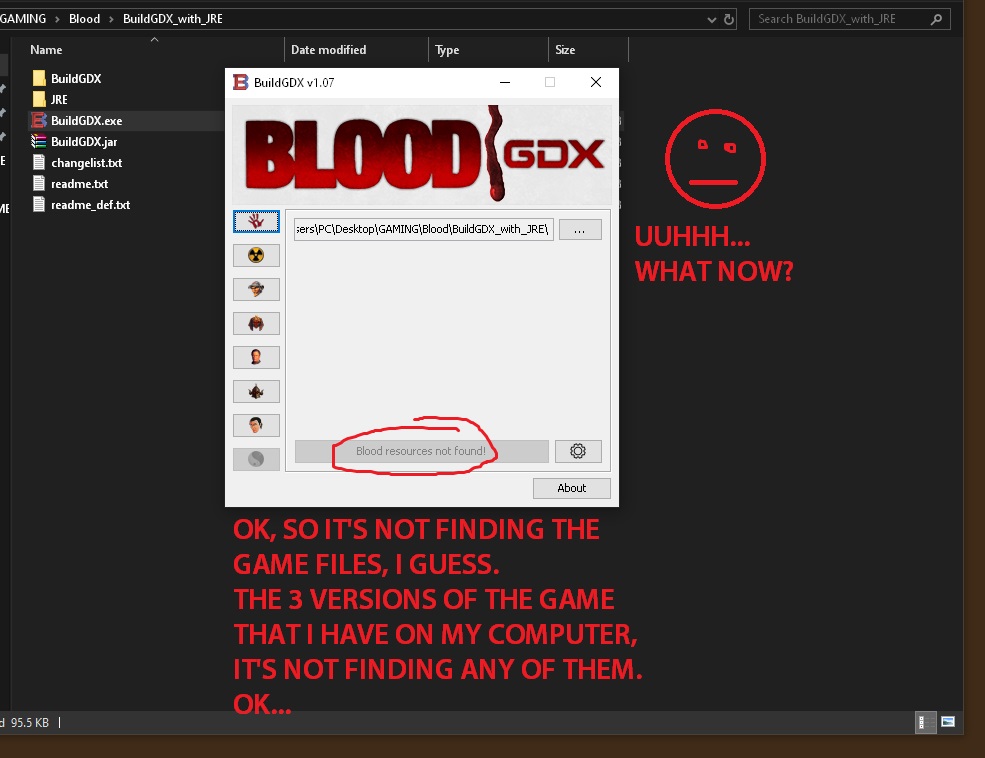 Then
Then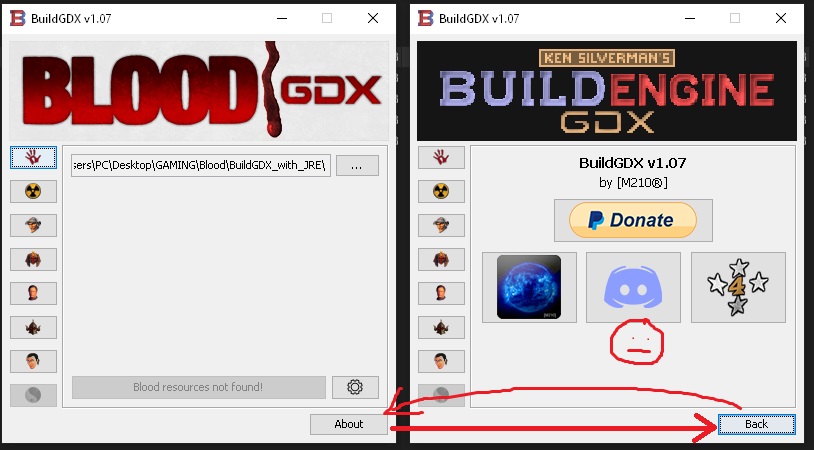 Then
Then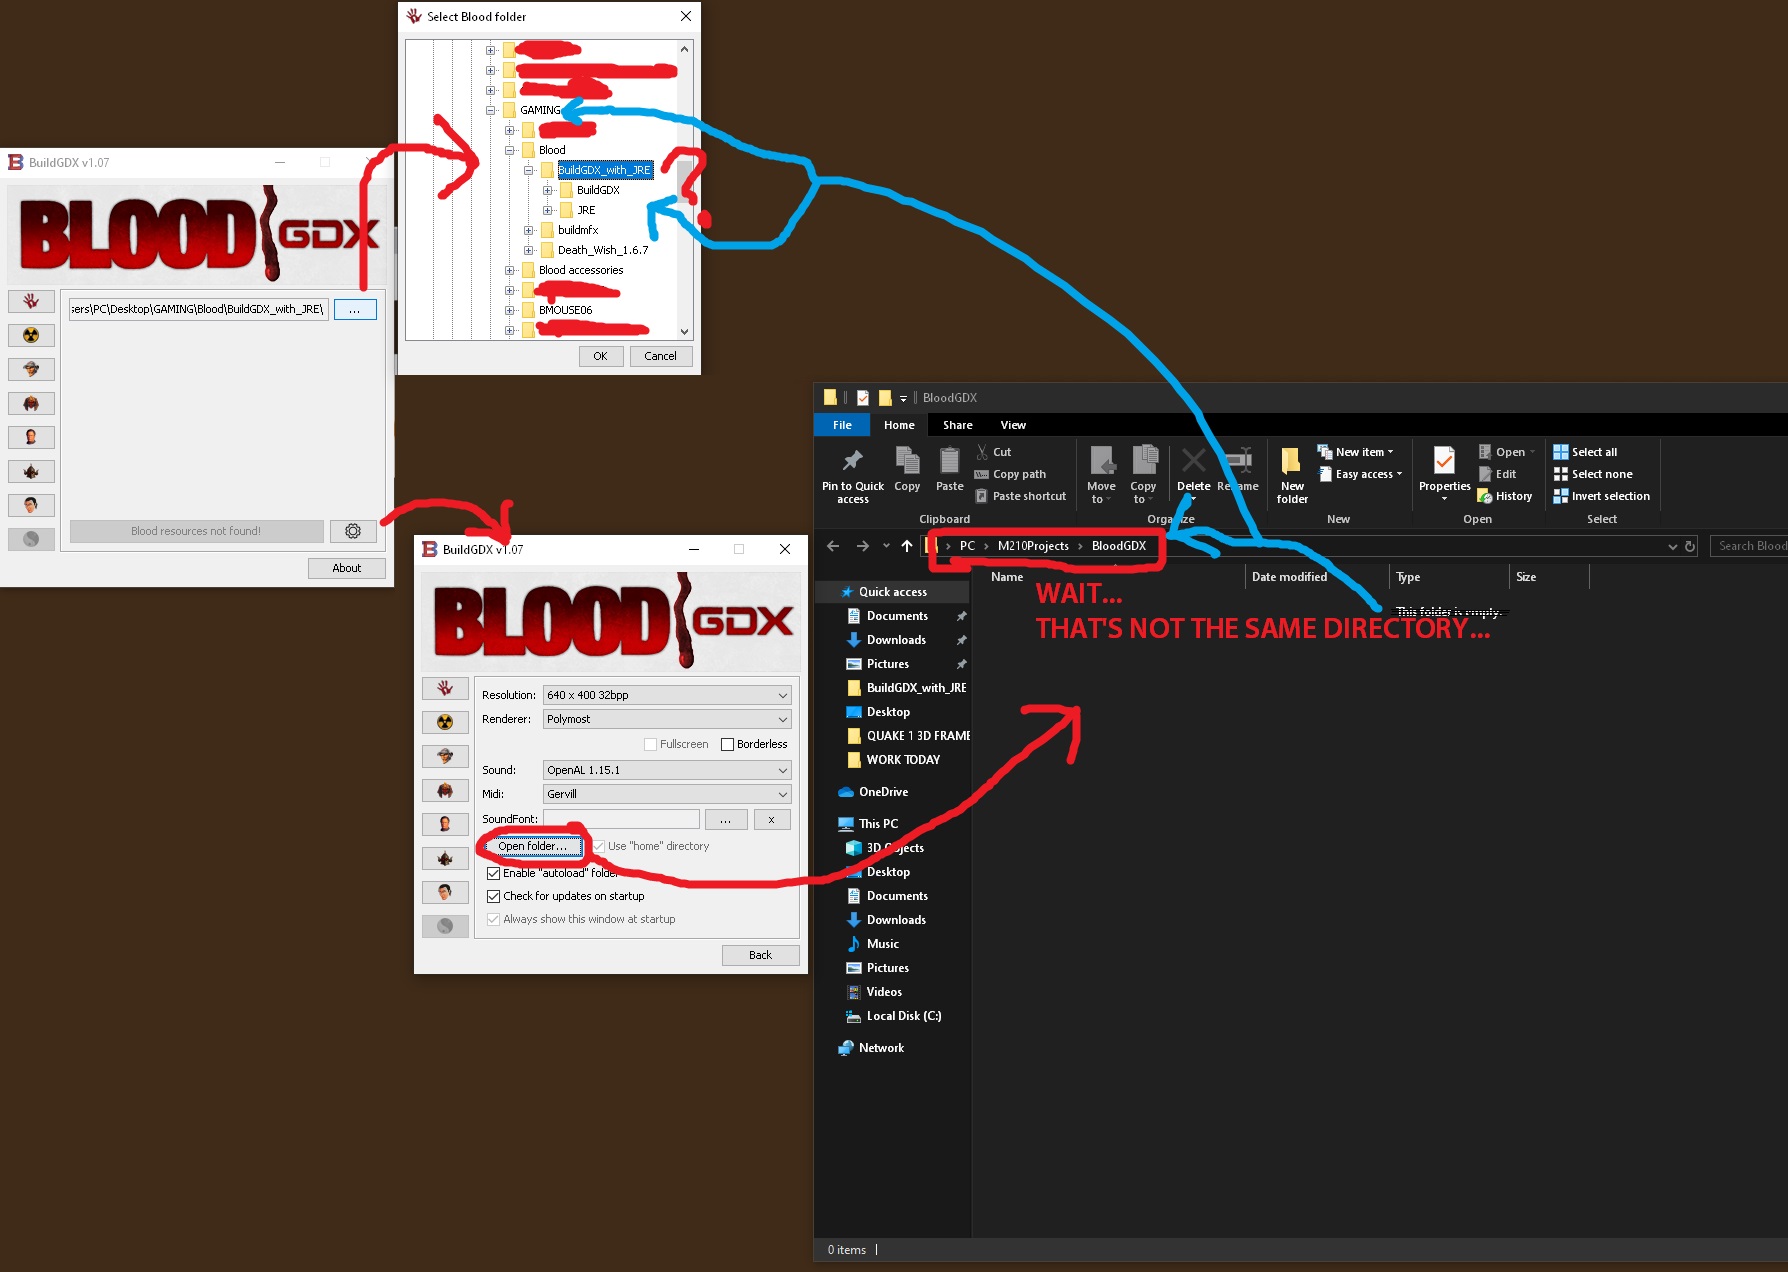 Then
Then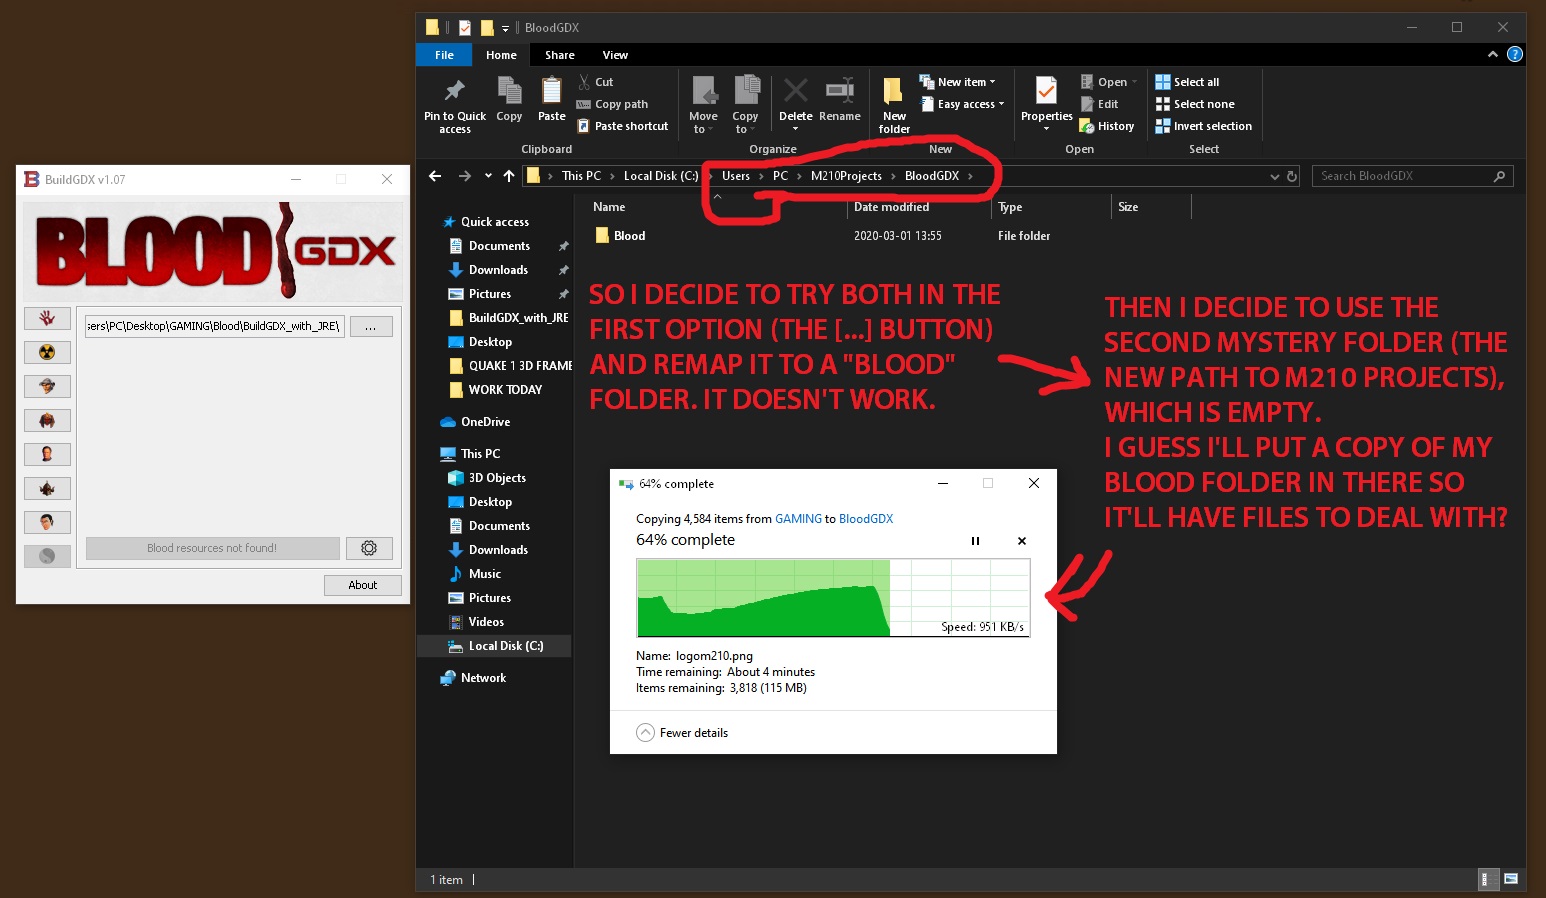 Then
Then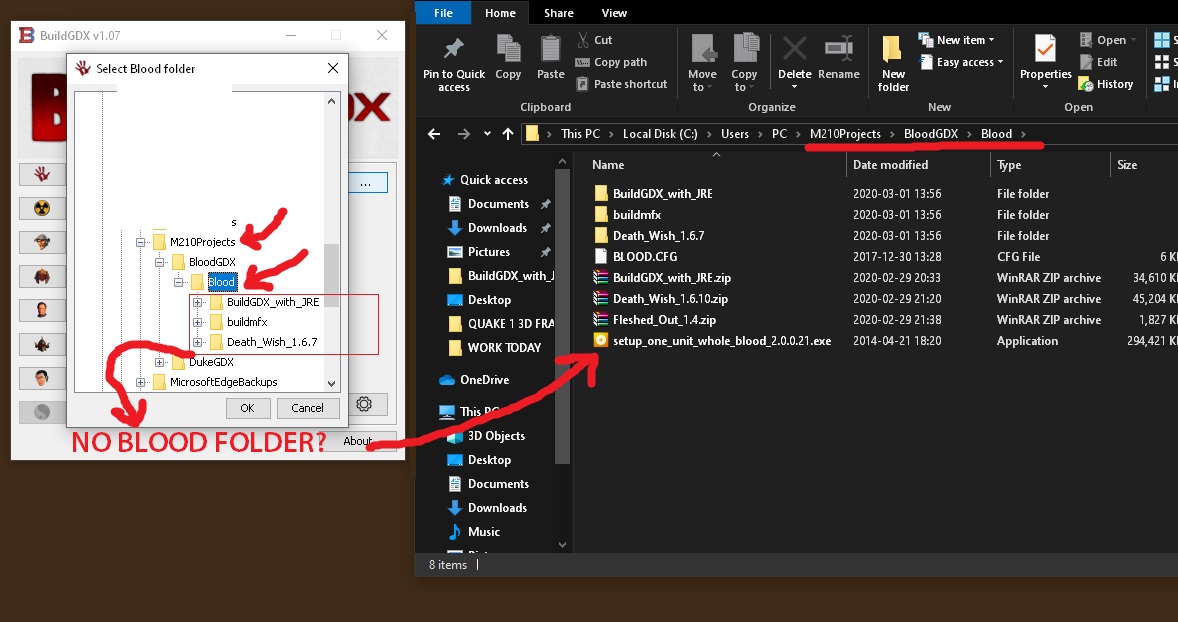 Then
Then Then
Then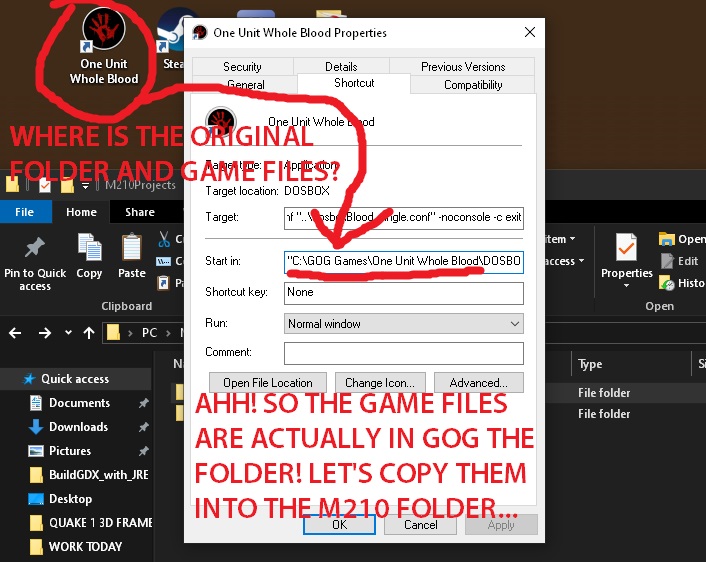 Then
Then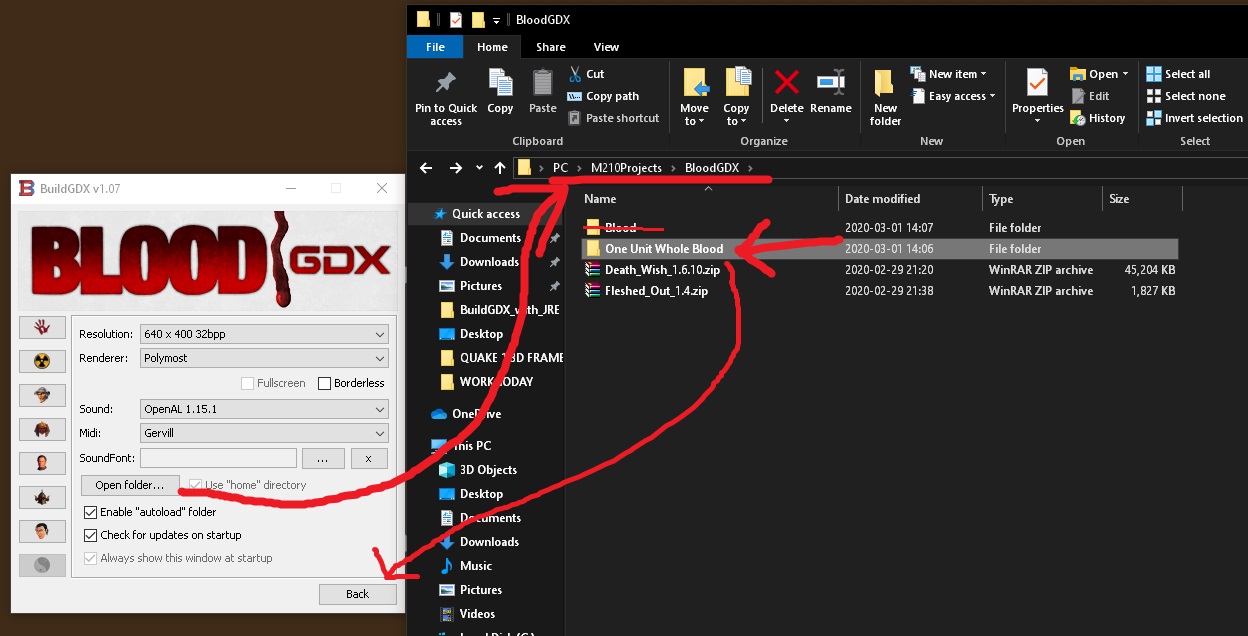 Then
Then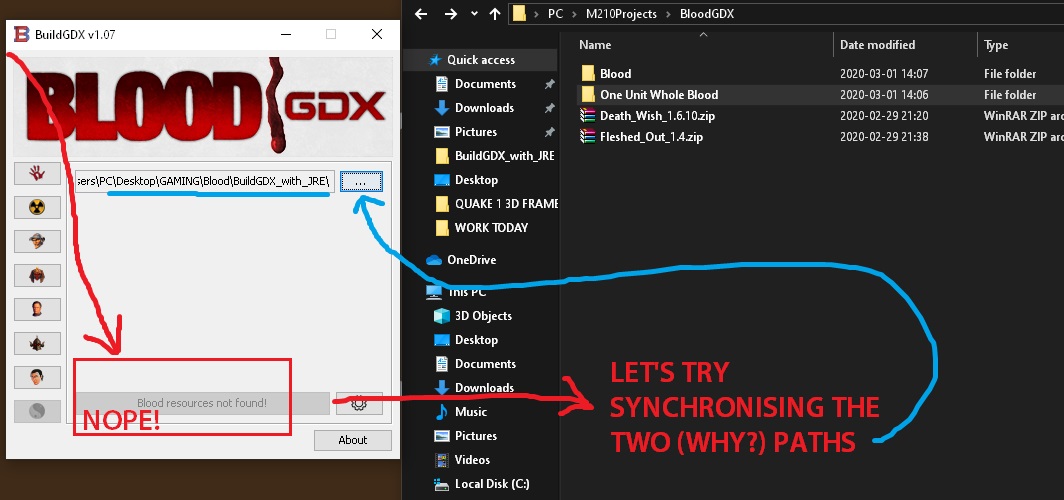 Then
Then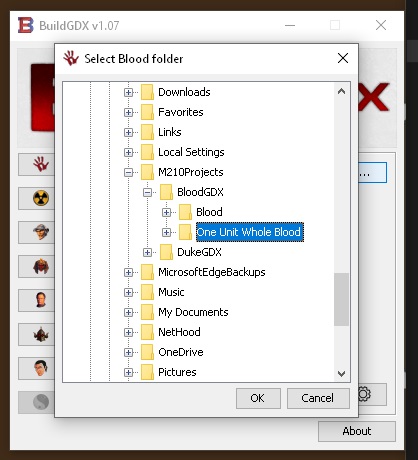
Then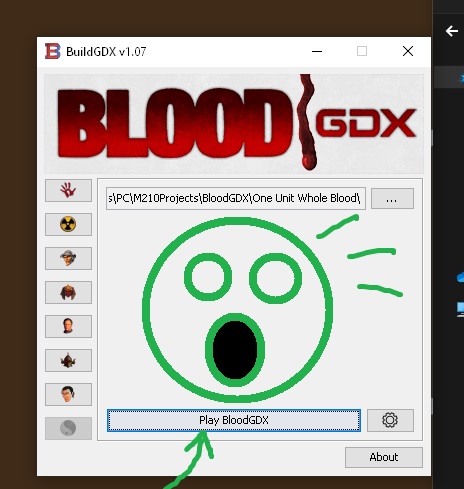
Ok, so I got it working, somehow! Let’s do this again, but easier.
PART TWO: Clear instructions for success!
- Have the original Blood game files (from GOG or Steam or the CD, etc.).

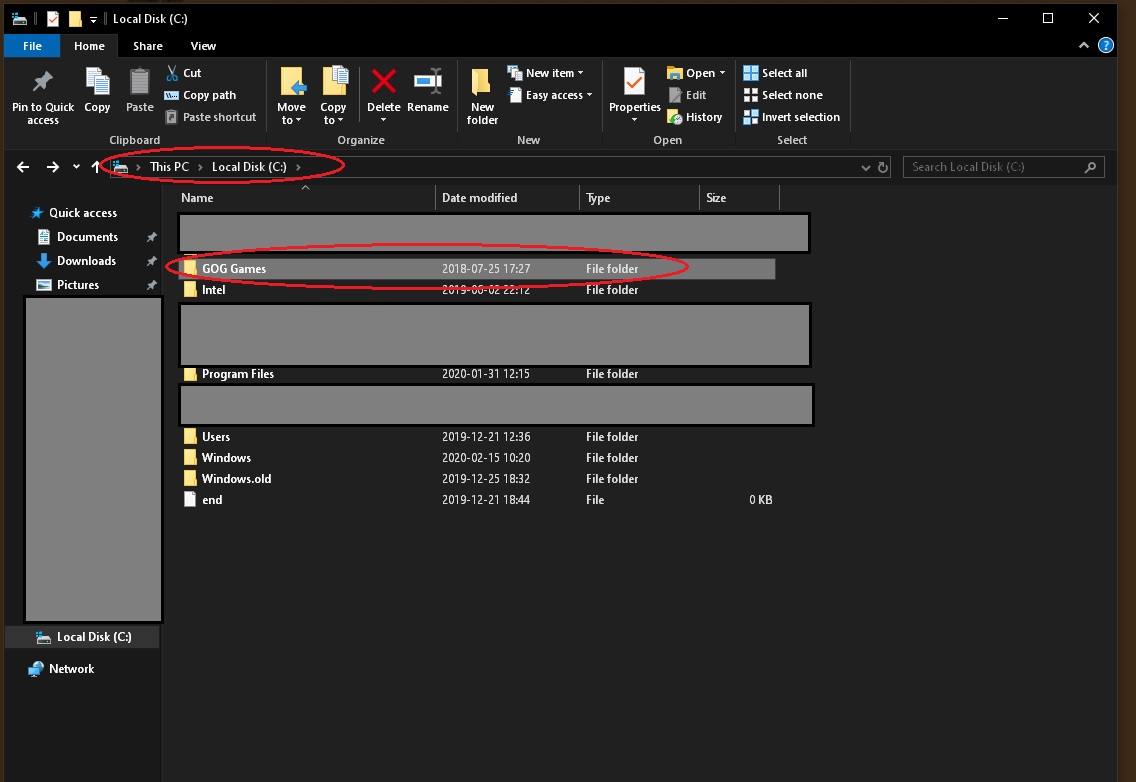
- If from GOG, for example, your original Blood game files will be saved in the GOG folder, on the C:/ drive.
[BTW: A FILE is basically 1 document, like a sheet of paper, for example. A FOLDER is a sort of sleeve which contains files, like to carry around a bunch of separate pieces of paper (“files”). So a folder is a container of files. Ok? Ok.]
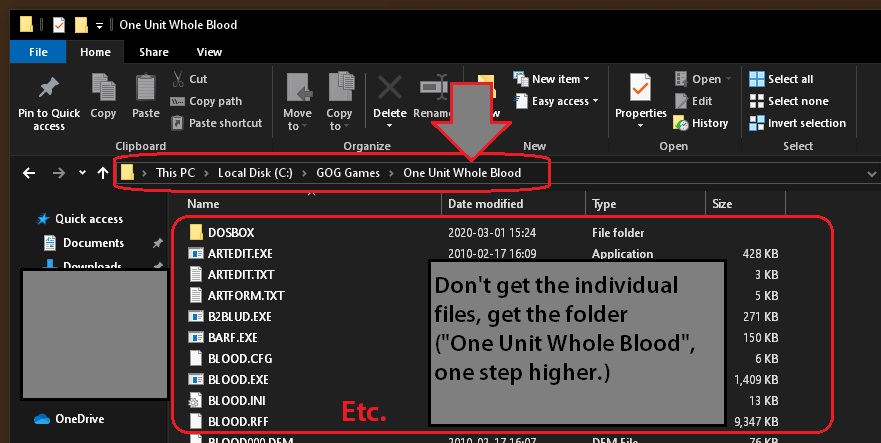
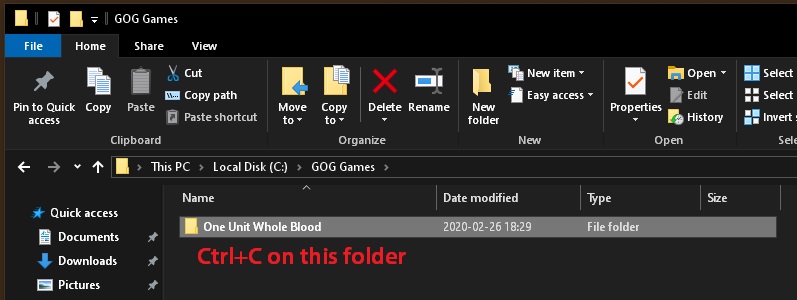
The files should look like this (see picture below):
Copy the One Unit Whole Blood game-files FOLDER (ctrl+C) from the GOG folder.
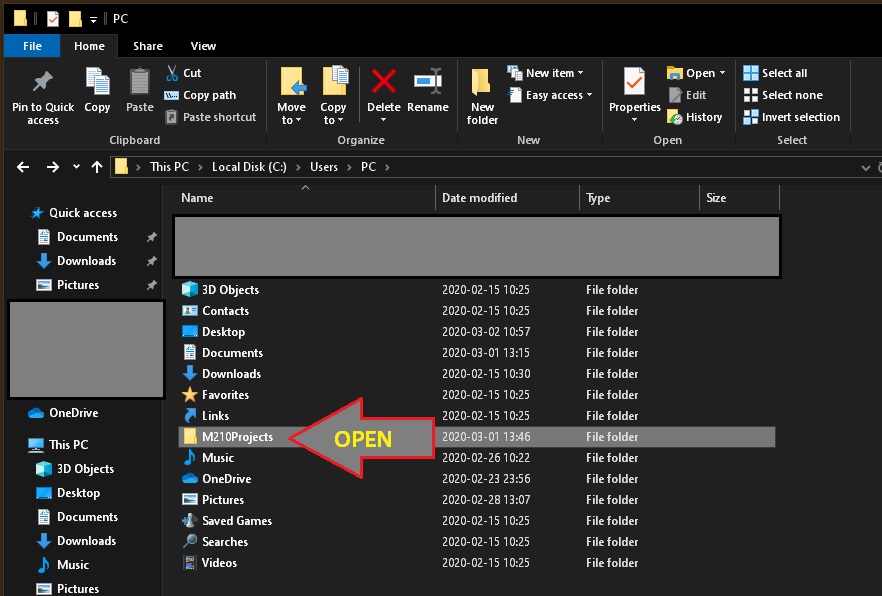
Then navigate back to the C:/ drive, and then navigate until you find the new “M210” folder created by the BloodGDX installer (see address below or in image).
On my PC the address looks like this => C:\Users\PC\M210Projects
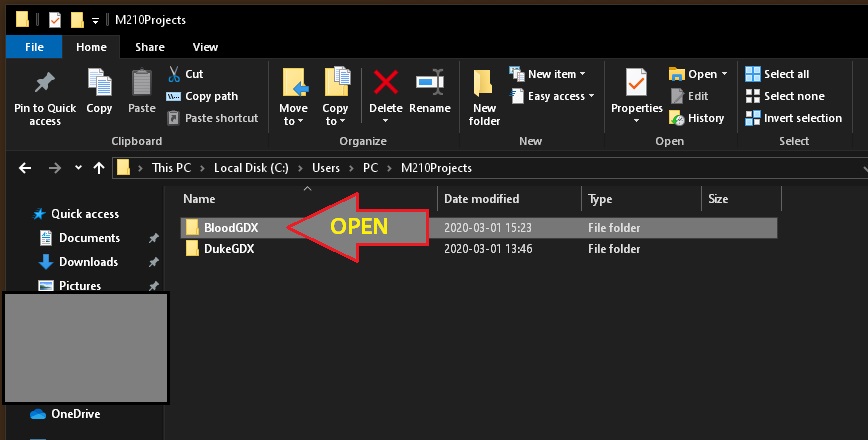
Open that to find the “BloodGDX” folder (pic below).
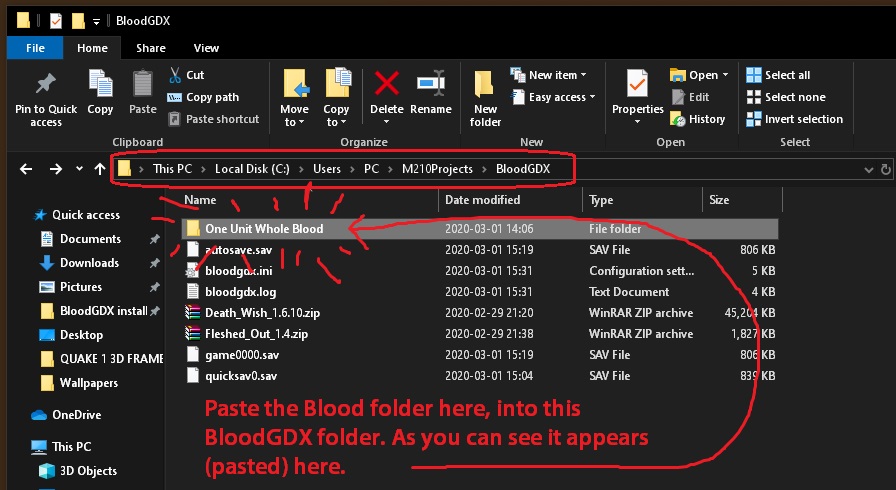
- Inside the BloodGDX folder, PASTE the One Unit Whole Blood folder.

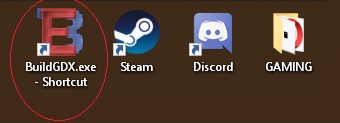
- Good! Now go back to your desktop (or to where you saved your BloodGDX installer for easy access [the executable file]). Mine are on my desktop, as shown below.
 =>
=> 
Note: I won’t be using that Blood shortcut anymore (the one seen on the left in the above pic). Instead, I’ll use the BloodGDX launcher to play Blood. You should probably make a shortcut to it on your desktop too, later, after everything is setup.
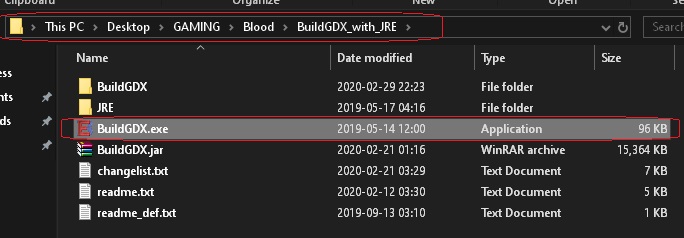
Navigate to the BloodGDX folder. Here, mine is the easy version with JRE. Open that folder to find the BuildGDX.exe (executable) file, like in the picture below.
Then
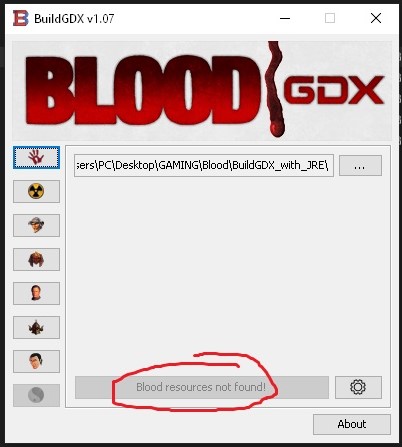
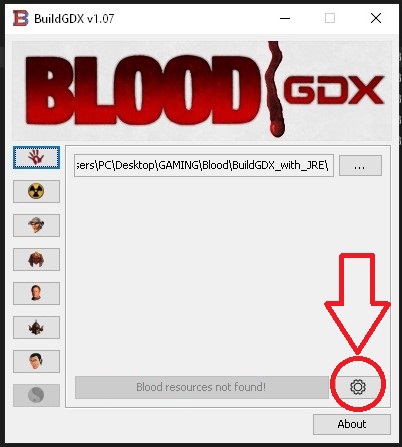
- Click the executable for BloodGDX (where ever you put it, it was in the unzipped folder you downloaded). It will still say that the game files are not found. That’s ok for now.

You have to manually tell the installer where the One Unit Whole Blood files are.
So click the […] button and find this location in the picture below. …The files are here. Click “OK”; we’re back at the launcher which still doesn’t know where the game files are.
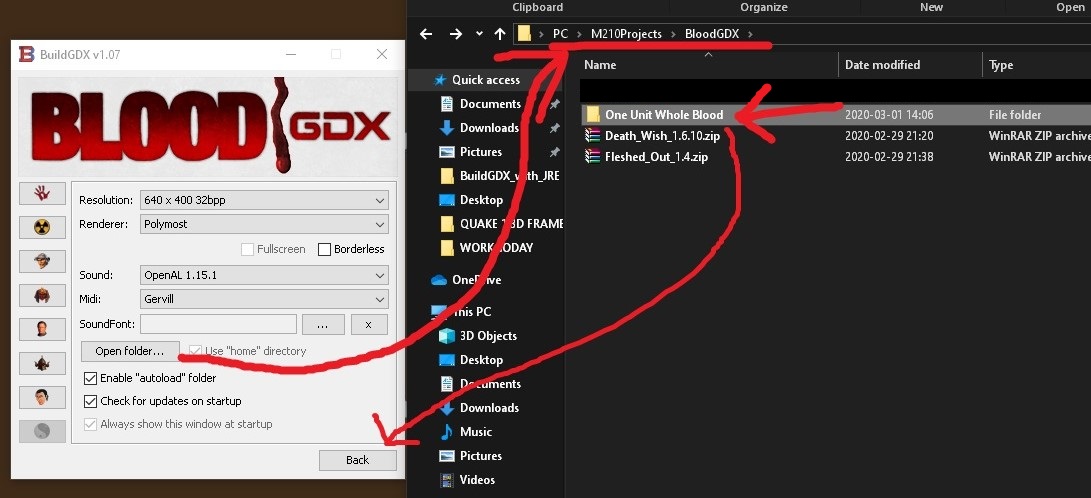
 - So now, click the “Options” cogwheel button at the bottom of the installer to open the next options page. This looks like this (see pic below).

Choose the One Unit Whole Blood game-files folder in this directory (which is somehow not the same one as the other one we did). Note: While here, change the resolution to match your monitor and check the “Fullscreen” box (if you want the game to play full screen). No need to touch anything else here for now. Tweak it LATER, if you want.
 - Click “Back”. The files should now be recognized by the installer.

- Launch Blood! (…on every wall and ceiling and everywhere! >:D )
- Configure the game before playing.
I love how you can immediately see most of the changes in the demo of the game, in the menu’s background, so you can really see what each option does and compare what options you like and not (like Voxels Off, for example). Very well designed! - Have a blast playing Blood! GG!
The end! Hope this helps!
Note: For add-ons, like the DeathWish maps (I very strongly recommend these maps after finishing the original game!), put the downloaded zipped folders in the C:\Users\PC\M210Projects\BloodGDX folder. Unzip them so the game recognizes them, and then add these new unzipped folders into the game at this location in the image below for easier access in BloodGDX.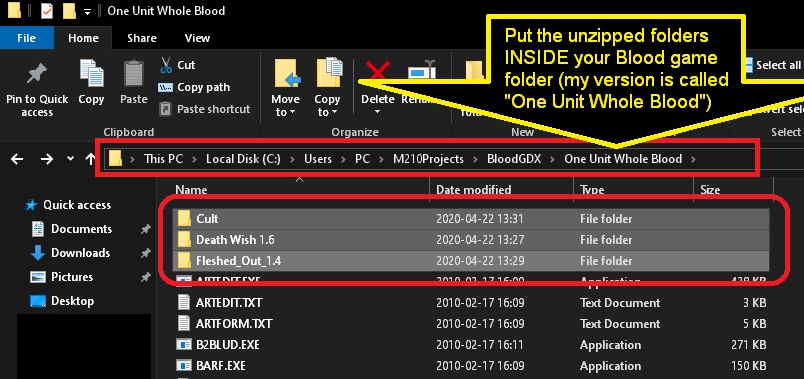
P.S.: There might be a bug that I’ll have to come back to, as each level ending doesn’t load the next level with all your weapons and items (I have to start a “new game” each time I finish a level and lose all weapons and items). So I’ll have to come back to this.


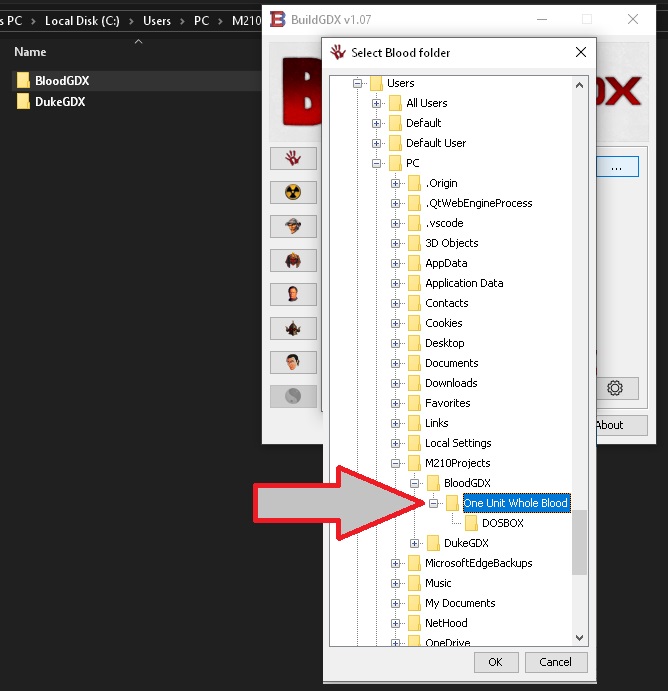 …The files are here. Click “OK”; we’re back at the launcher which still doesn’t know where the game files are.
 Note: While here, change the resolution to match your monitor and check the “Fullscreen” box (if you want the game to play full screen). No need to touch anything else here for now. Tweak it LATER, if you want.